Top 10 Ways To Evaluate The Reputation And Reviews Of A Chinese Furniture Maker
Here's a guide that will assist you in assessing the credibility and reviews of the Chinese furniture maker, such as OPPEIN. Particularly, if are looking for custom-designed furniture such as cabinets for kitchens or wardrobes.
1. Search Online:
Conduct a thorough online search to find out the reputation of a company. Find reviews on various platforms, including social media, trade websites and forums that are dedicated to furniture or home improvements. Be attentive to general reviews and look for any common themes. The initial research will provide an overall view of their position on the market.
2. Utilize Review Aggregators:
You can make use of review aggregaters, like copyright Yelp as well as Google Reviews, to get reviews from a variety of sources. These platforms offer ratings that can be used to gauge the degree of satisfaction with your service. You should look for more than just stars since they will give you more insight into the experience of your customers.
3. Look for industry awards.
Do you know if a manufacturer has received industry recognitions or awards? Recognition from trustworthy companies can indicate an established reputation in the market. They also highlight the company's creativity, customer service, and high-quality. You can learn more on any awards they've been awarded on their website and in press announcements.
4. Request references from clients:
Ask for references directly from former clients. Former clients may be able to give personal accounts of their experiences. They could also give details regarding the quality of products and customer service, as well as satisfaction levels. Be sure to inquire in detail regarding the reliability and speed of service during the order and delivery procedure.
5. Portfolio and Case Studies:
Check out cases studies and portfolios that are provided by the company. These documents highlight their abilities and successful projects. Portfolios with a lot of completed projects are a sign of a business that is experienced at meeting the needs of different clients. Find similar projects as yours in order to evaluate their expertise in your specific field.
6. Monitor Social Media Presence
Evaluate the manufacturer's social media presence and engagement with customers. Positive social media presence indicates an interest in interaction with customers as well as customer satisfaction. On their posts you should look out for shares, comments, and responses to queries from customers. Communicating regularly with their followers Engaged manufacturers respond faster and are more reliable.
7. Investigate Customer Service Practices:
Contact the manufacturer and ask questions to evaluate their customer service. Be sure to pay particular attention to how fast and efficiency in which they respond to your questions. A company that offers clear and helpful information demonstrates an interest in customer satisfaction and is more likely to enjoy a positive reputation.
8. Be sure to look for consistency:
When you collect reviews, you should seek out consistency. If a number of reviews highlight the same positive or negative aspects You can be sure that they are accurate in describing the company's performance. Consistent feedback will help you to recognize the strengths and weaknesses of a manufacturer.
9. Research Complaints Resolutions
Investigate all complaints against the manufacturer. These include complaints made in consumer protection forums and websites. You should also look at how the manufacturer addresses these complaints. A manufacturer that addresses complaints and does everything possible to address issues shows their dedication to their customers and can show a positive reputation.
10. Evaluation of the longevity of an individual and their experience
Examine the longevity of the company within the market. A manufacturer with long-standing experience in the industry is more likely to have established a name that is well-known in the course of time. Information on the manufacturer's experience and history, as well as their growth rate can aid in determining their stability and reliability.
In the end, assessing reputation and reviews of the reviews of a Chinese furniture manufacturer such as OPPEIN requires a thorough approach that incorporates online research customer references as well as industry recognition. These tips can help you get a greater understanding of the manufacturer’s position on the market and help you make an informed choice about your furniture. View the recommended bedroom wardrobe design catalogue for website info including closet ideas walk in, kitchen cabinet style, contemporary kitchen cabinet colors, armoire wardrobe with shelves, base cabinet kitchen, kitchen cabinet manufacturers, kitchen cabinets ideas, two color kitchen cabinets, large wardrobe closet, open kitchen cabinets and more.
Top 10 Ways To Evaluate The Sustainability Practices Of The Chinese Furniture Manufacturer
This guide will help you in evaluating the sustainability practices that are employed by a Chinese Furniture Manufacturer like OPPEIN. Particularly when you are looking at customized furniture like kitchen cabinets, closets, and more.
1. Look at the manufacturers' sustainability policies.
Start by reading the official sustainability guidelines of the company. Some companies have published their environmental responsibility pledges on their websites or in their sustainability reports. It is possible to find out their goals with respect to resource conservation, waste minimization as well as carbon emission reduction. ethical sources. A clear, articulated policy is a reflection of the company's commitment to sustainability.
2. For more information about material sourcing:
Examine the origins of the materials. Sustainable practices typically involve the use of recycled, renewable or sustainably harvested products. Check to see if the wood comes from sources that have been certified. For instance, they are that are certified by the Forest Stewardship Council. Knowing their source of supply can help you gauge the level of commitment they have to sustainability.
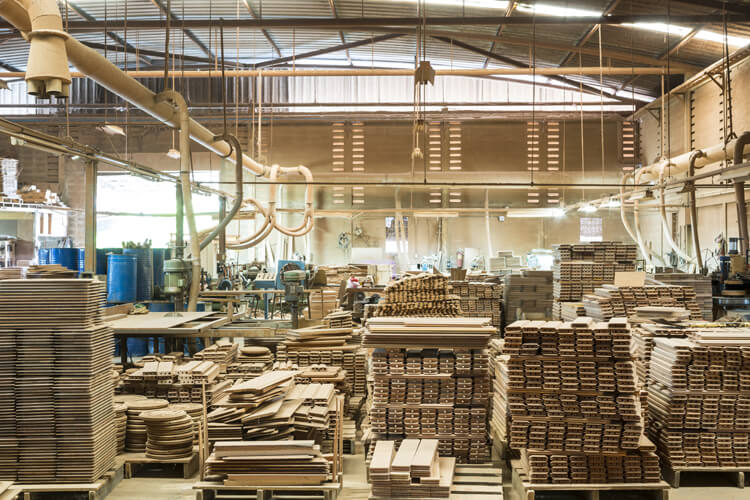
3. Evaluate Manufacturing Processes:
Investigate how the manufacturer manufactures the product. Sustainable production methods could include efficient energy-saving machinery, reduced consumption of water and waste generation. Find out how they make and what steps have been taken to reduce the environmental footprint of their production.
Life cycle assessments of review:
Check to see whether the product is subject to life cycle analysis (LCAs). LCAs help to assess the impact that an item has on the environment, starting with the raw materials used in its production and continuing through its production, use, and the disposal. Companies committed to sustainability typically have LCAs that demonstrate their efforts to minimize negative effects throughout the entire life-cycle of a product.
5. Assessment of Waste Management Practices
Find out about the company's waste management methods. Sustainable manufacturers often have implemented strategies to cut down on the amount of waste they produce. This includes recycling scrap materials and repurposing products that are produced. Understanding how they handle waste can provide insights into their sustainability efforts and commitment to principles of circular economy.
6. Investigate energy usage and efficiency
Analyze the sources of energy utilized by the manufacturing facility. Wind, solar and biomass are some examples of renewable sources that manufacturers can use to reduce their carbon foot print. Learn about the energy efficient measures they have put in place, including lighting, machinery that is energy efficient and design of buildings that reduces energy consumption.
7. Examine Packaging Practices:
Evaluate sustainability of the packaging materials used by the producer. Sustainable packaging should be based on recyclable, biodegradable or minimalistic designs to reduce the amount of waste. Find out about their packaging and whether they are following practices such as Reduce-Reuse-Recycle to reduce the environmental impact of shipping and handling.
8. Look for Certifications and Compliance:
Examine whether a company has sustainability certifications. Certifications like ISO 14001 in environmental management and LEED in green buildings from acknowledged organizations demonstrate a commitment to sustainability. These certifications may provide assurances that the manufacturer adheres strictly to environmental standards.
9. How can we assess social responsibility efforts?
Sustainability is not just about environmental responsibility, it also includes social responsibility. Check out the manufacturer's working practices. This includes fair wages and worker rights. A manufacturer whose business practices are based on social sustainability is an excellent example of a company that adopts a holistic and responsible approach.
10. Request feedback from eco conscious customers
You may also inquire from others customers, or other professionals in the industry that care about sustainability for their views regarding the practices of the company. Online forums, sustainability-focused groups, and reviews can provide insights from individuals who have firsthand experience with the manufacturer's commitment to sustainable practices. Their perspectives can assist you in making an educated assessment.
To conclude, assessing sustainability practices for an Chinese furniture maker like OPPEIN is a thorough assessment of their policies and efforts in social responsibility in addition to the sourcing of raw materials, manufacturing processes and so on. These guidelines can help make sure that the company's values for sustainability are aligned to yours and that it contributes to a healthy environment. Have a look at the most popular hotel furniture suppliers for blog examples including wardrobe and cabinet, walk in closet design, luxury design kitchen, armoire with drawers, white kitchen cabinets design, modular cabinets, cheap kitchen cupboards, walk in closets, high end kitchen cabinets, ar moire and more.


